How to make a car
This article will show you how to create a car from scratch!
In this tutorial, we will use constraints to attach the wheels to the car, and some basic scripting to handle player input. I will show you step-by-step how to build the car and write the scripting for it. The full script for the car can be found near the bottom of this page.
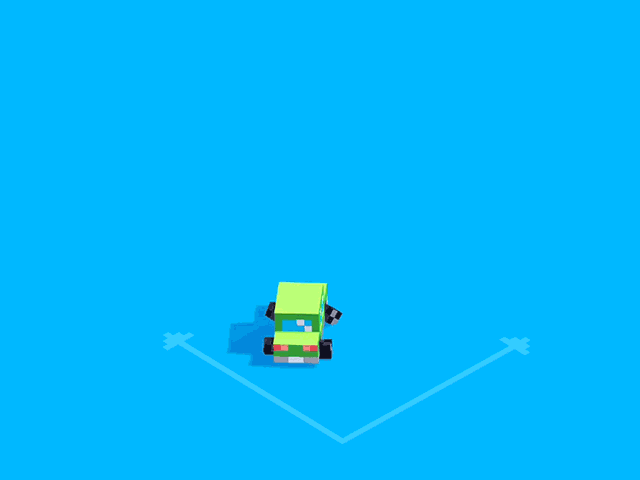
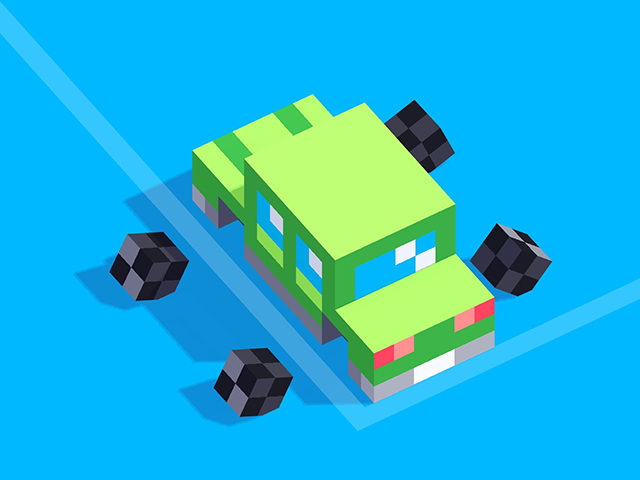
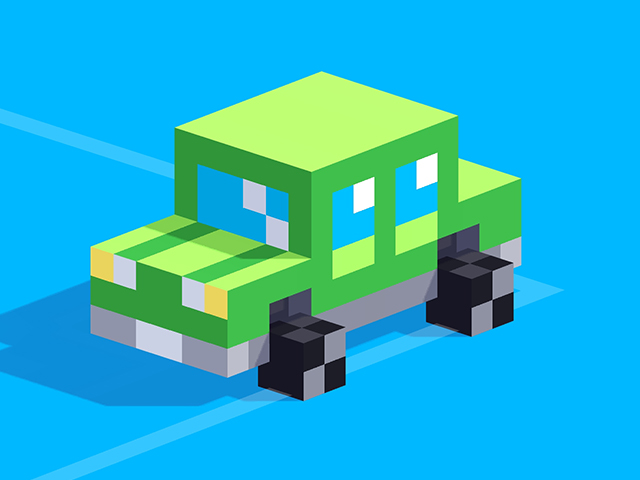
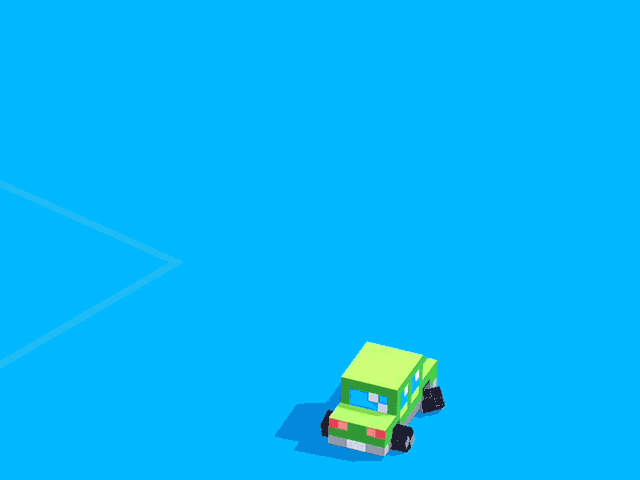
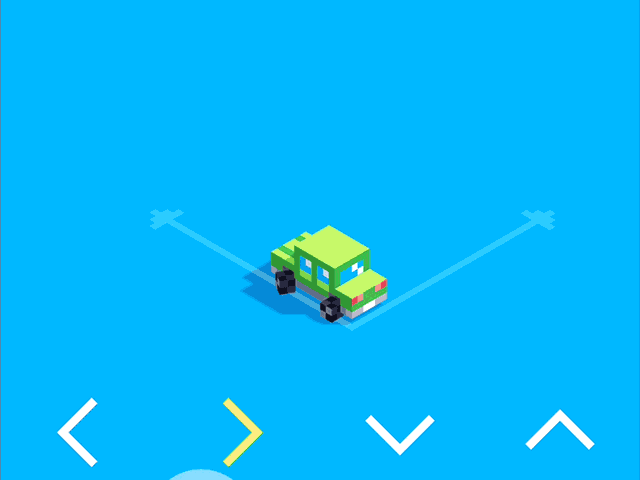
By the end of the tutorial you will have a car like this:
Modelling the car
The first step is to build the car object. For this tutorial I made a little green sedan, but feel free to make any car you want! It does not need to have the same size as mine, either.
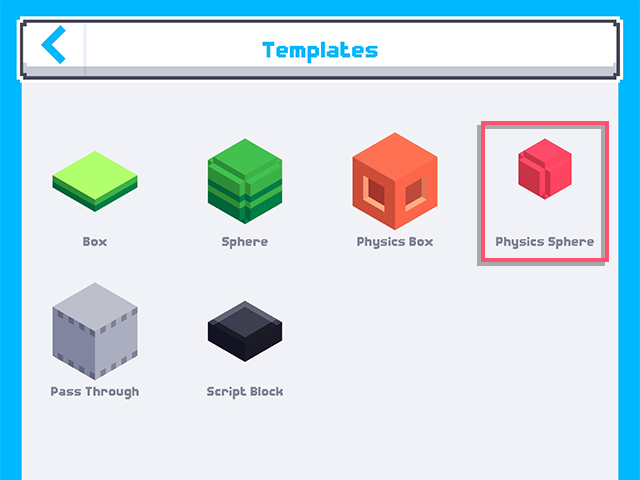
I will use the Physics Box as a template. You can use any block, but the Physics Box has physics enabled by default. Ideal for moving cars!
You can find the physics box in the 'Templates' category in the inventory. It doesn't look much more like a car than it looks like an orange cube with square holes on every side. Let's model it to look more recognizable!
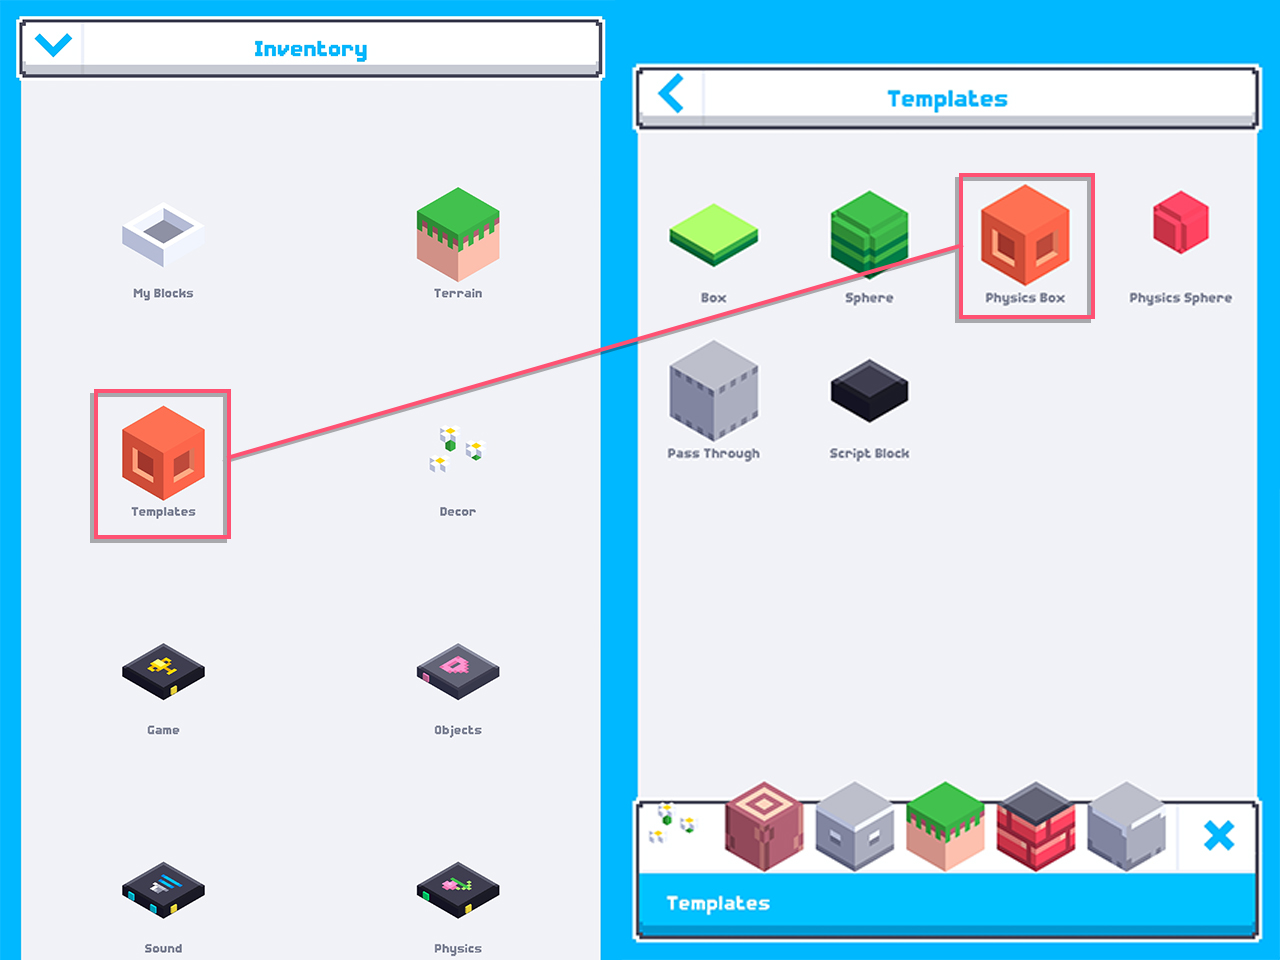
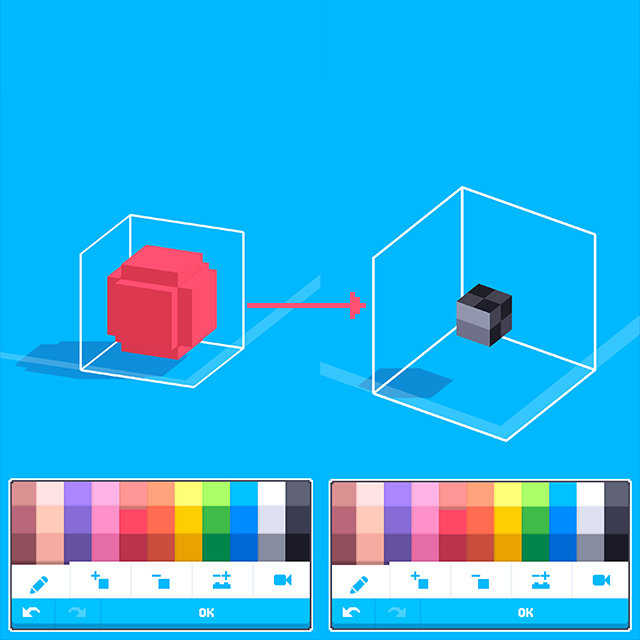
Place the physics box down on the ground, tap the pencil icon on the lower right corner, tap OK, and then you can begin modelling your car.
This is the car that I made:
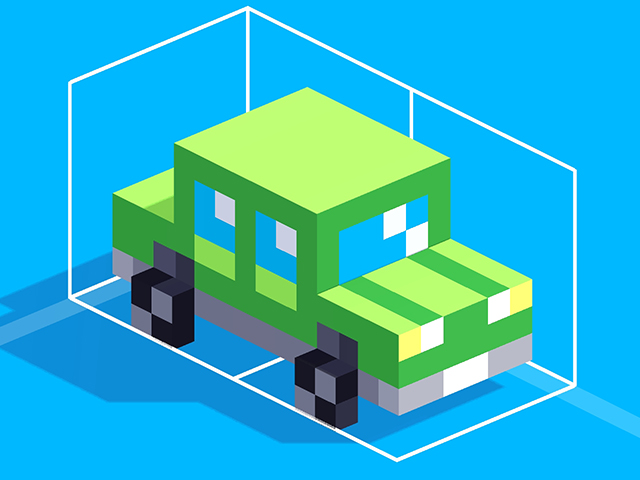
It's the greenest car you have ever seen. (Also given that it is powered digitally by a single phone, it is also incredibly friendly for the environment!)
A few important points before you model your car: Make sure your car is facing in the positive z-direction, as shown in the image below. This will be important later, when setting up constraints for the wheels.

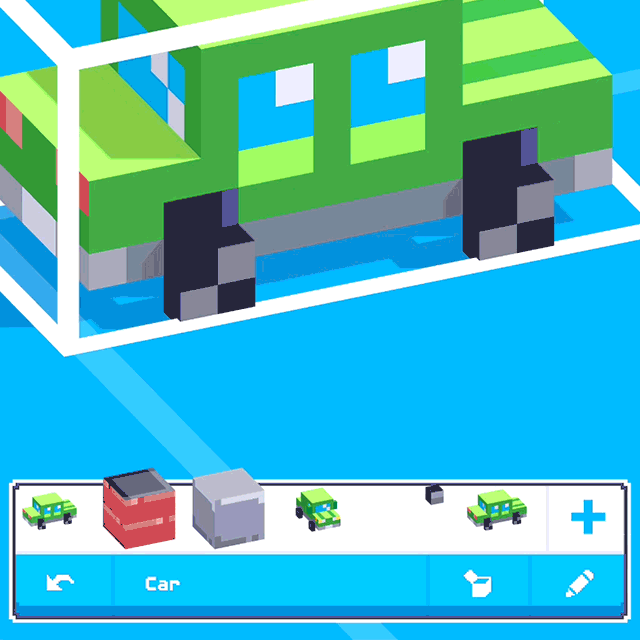
Make sure the wheels are separated from the car itself. Voxels will glue together when they are next to each other; not ideal for wheels that need to be spinning on their own! To remove the glue between the car and the wheels, use the glue tool in the voxel editor:
Modelling the wheels
We will also create a wheel object. The reason we have to do this is because the current wheels on our car cannot be used as actual wheels, because their colliders are boxes. Instead, the box wheels are only there to define where the real wheels should be. Research has shown that circular shapes are best for rolling on flat surfaces. Therefore, we need to replace our wheels with sphere wheels!
It is important that you use the 'Physics Sphere' object as a template for your wheel. Physics spheres are special, because their colliders are spheres instead of boxes. The size of this wheel doesn't matter, but I made mine a 2x2x2 cube:
Adding constraints to the car
Now that you have made your car, it is time to give it some springy action!
Before we do that, however, we need to assign some variables.
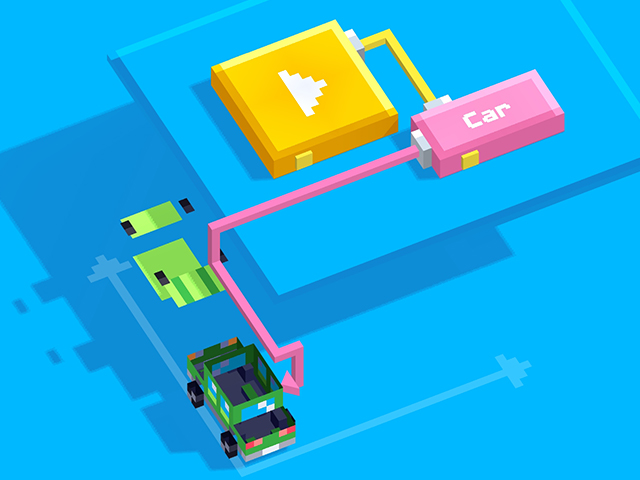
Select your car, then tap on the button on the bottom left. The top of the car will open up like a lid.
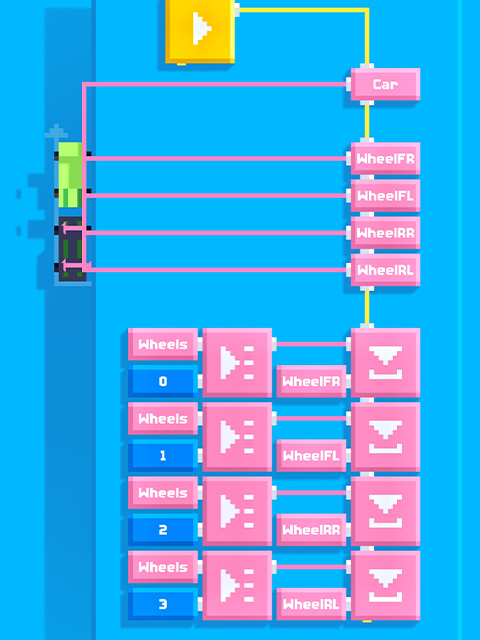
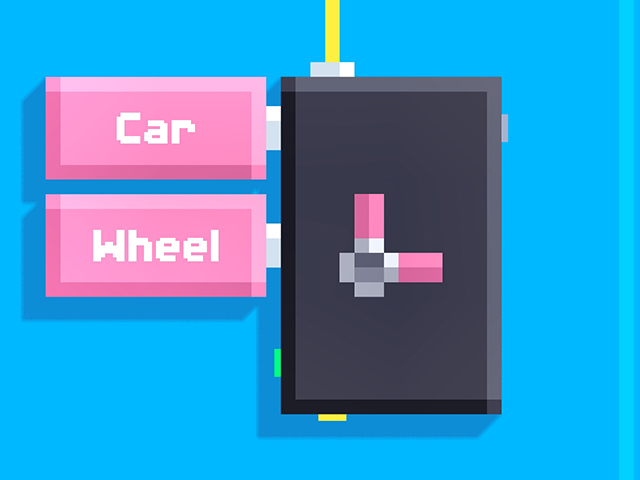
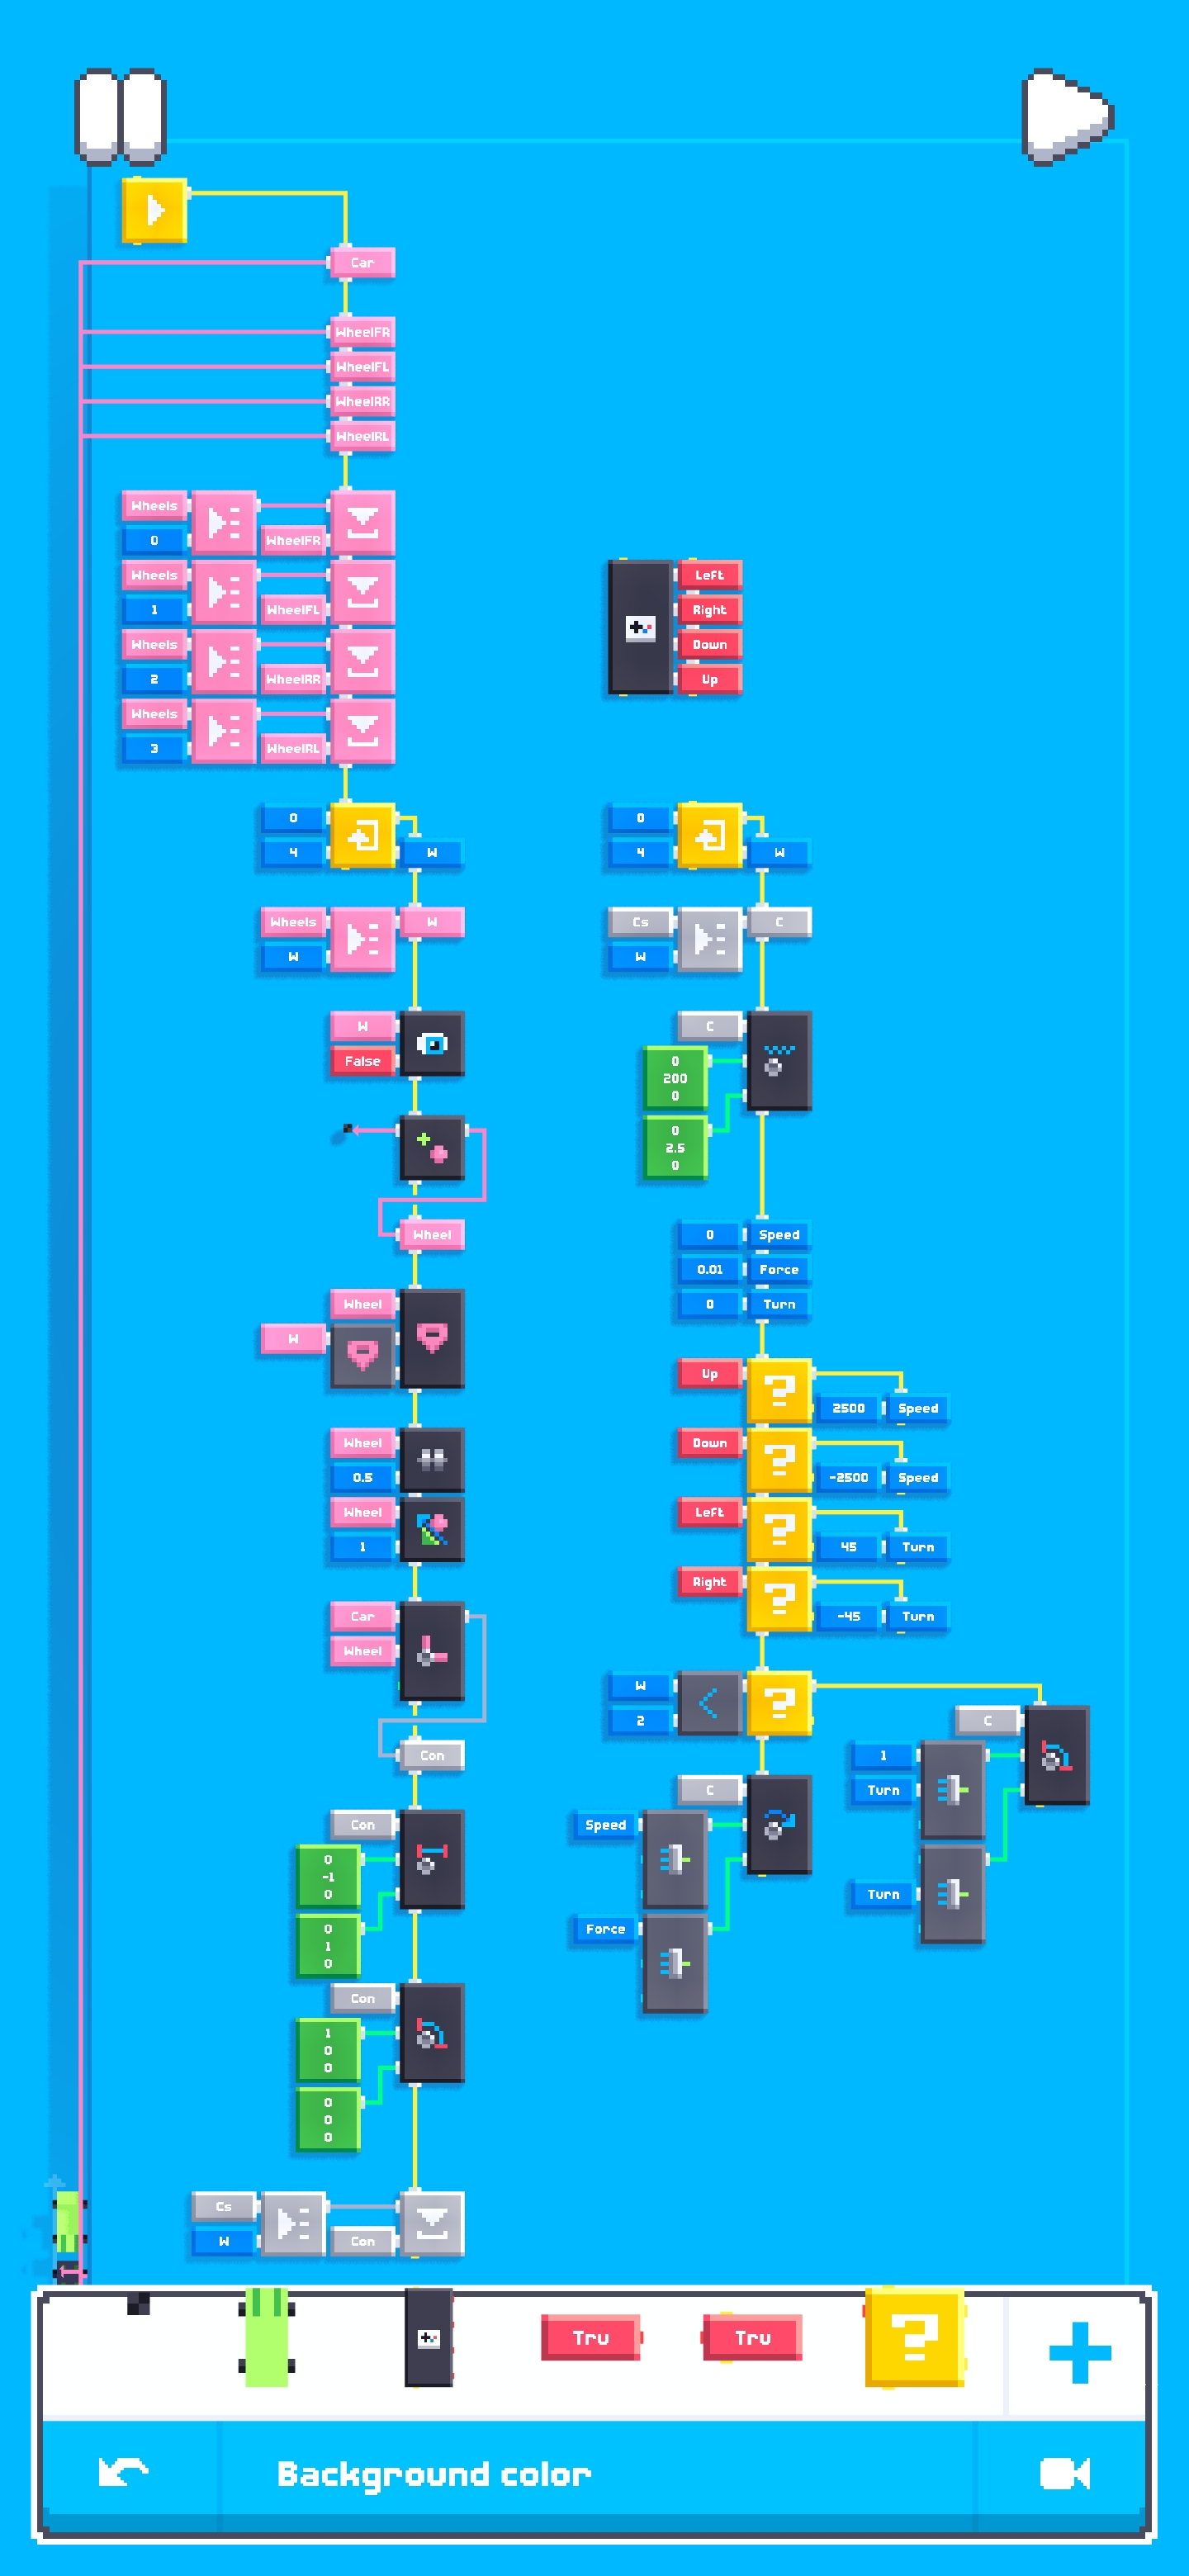
First, I will assign an object variable called 'Car'. I will drag it's wire to the car.
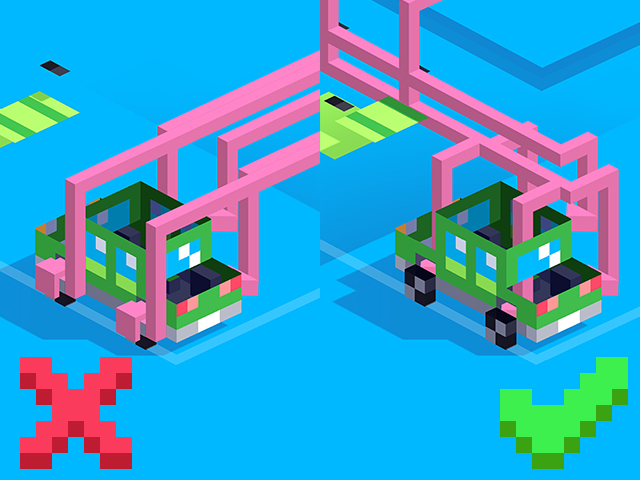
I will do the same for each of the four wheels (front right, front left, rear right, rear left). These can sometimes be harder to connect because the wheels are quite tiny. If the wire connection shows a pink arrow pointing at the wheel, great job! If you see a large pink cube instead, you have created a script input by mistake, and you need to reposition the wire until you get the arrow.

Next, I will add each of the 4 wheels to a list. This will be useful for creating constraints for all wheels at the same time.
With all that setup done, we can finally configure the constraints for our wheels!
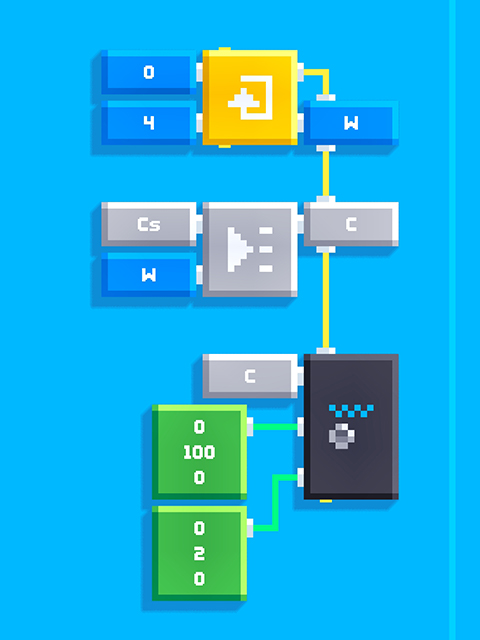
I create a loop that loops 4 times, once for each wheel. The W variable holds the current wheel number (0, 1, 2 or 3).
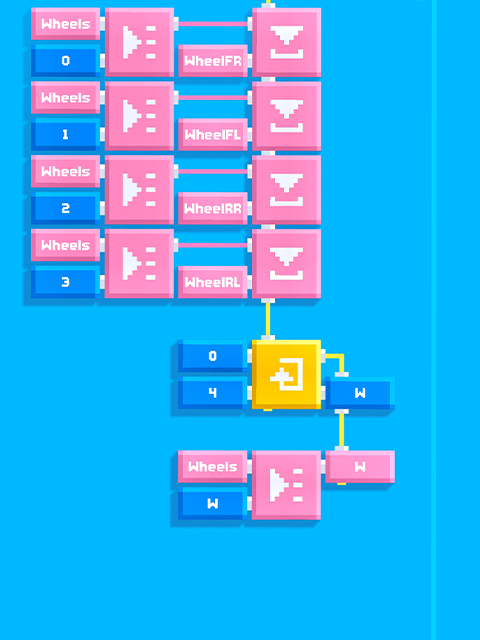
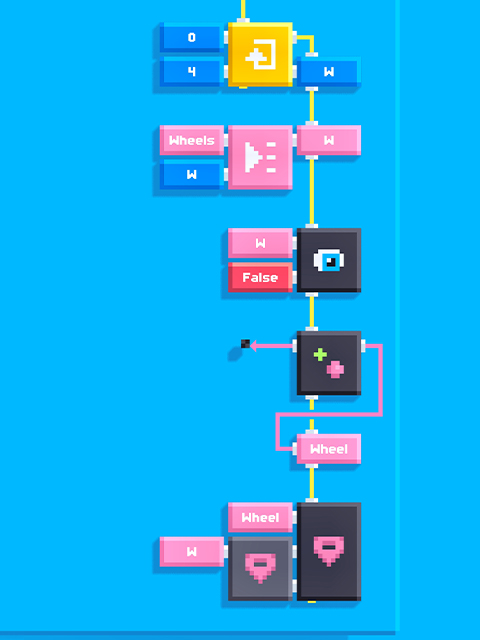
The next step is to hide our 'fake', square wheels with our circular, real ones.
To do this, use Set Visible to hide the 'fake' wheel.
Then, use Create Object to create a copy of the wheel you made earlier, and use Set Position to set the position of the new wheel to the old one.
The wheels are small, so they can be quite light. Therefore I give the wheels some extra mass. I also increase the friction of the wheels to 1, to make them less slippery.
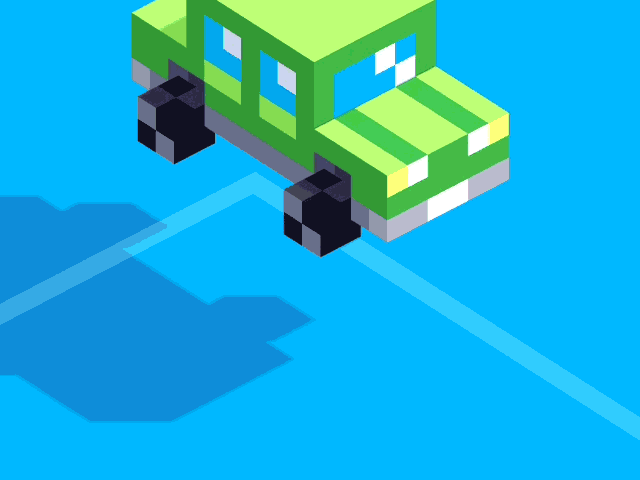
If you tap play now, you should see that your wheels have been successfully replaced! However, they are all disconnected from the car.
Let's attach them to our car with constraints!
Find the 'Add Constraint' block, found in the physics category in the inventory.
The 'Base' of our constraint will be the car object. The 'Part' will be our wheel!
There! Now our wheels are properly attached to the car!
The wheels are very stiff, and they cannot rotate yet.
To fix this, we need to define the Linear Limits and Angular Limits of the constraint. These blocks define the freedom/restriction of movement of the constraint. We want the constraint to move up and down, and we also want to spin the constraint along the wheel axle. To do that, we can configure the wheels like so:
Finally, we will add this constraint to a list so we can use it later. I will save the constraint to a list called Cs (short for constraints) and put it at index W (the wheel number).
Adding suspension to the wheel
Our wheels can now move up and down, but we still haven't added suspension to our car, so it falls to the earth.
Let's give our wheels some springy action!
We begin a new loop. This loop will run at every frame. For each constraint, we will add a Linear Spring to it.
You can configure the spring and damping parameters until you get something you like! I found that these values work best for my car.
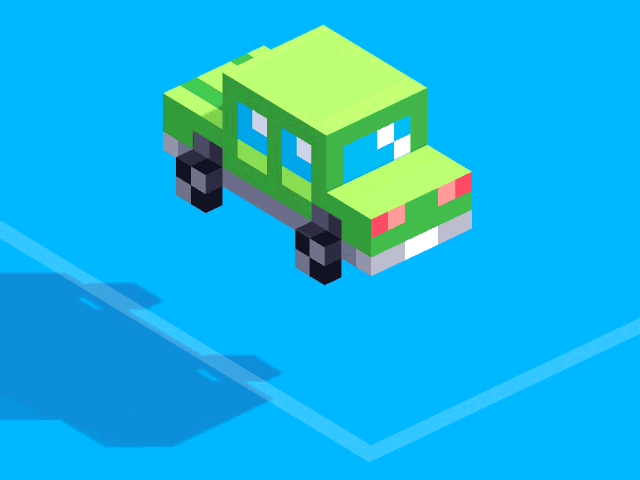
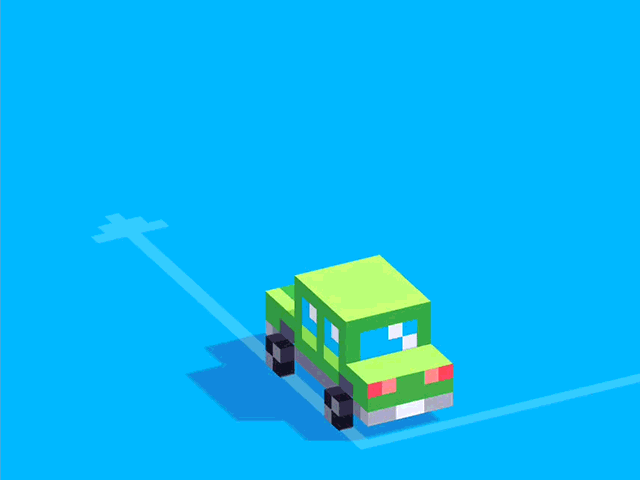
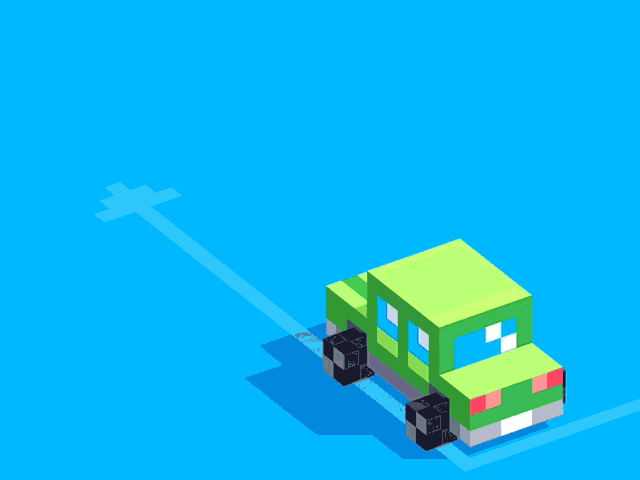
Look at that! Our car is nice and bouncy now!
We are really far into the tutorial, but the car still can't drive. Let's fix that now!
Underneath the Linear Spring script, add an Angular Motor script, like this:
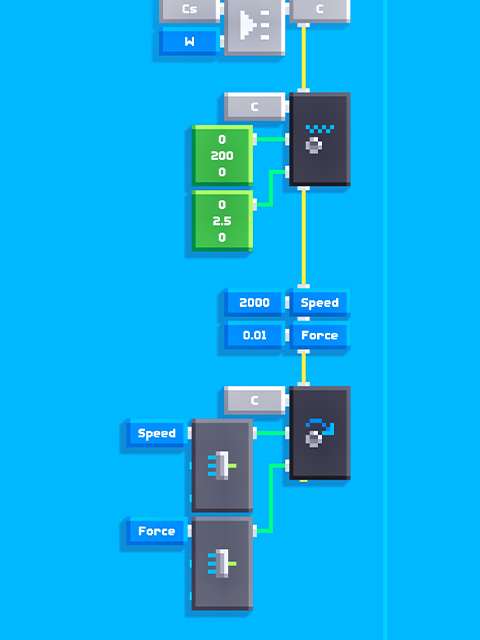
And again, you can configure the speed and force values to your liking. Speed is the top speed of the car, and force is similar to what you would call horse-power in the real world.
At last, the engine is running! Actually, it will always be running, without ever stopping. How about we add some simple touch controls?
Let's reconfigure the script:
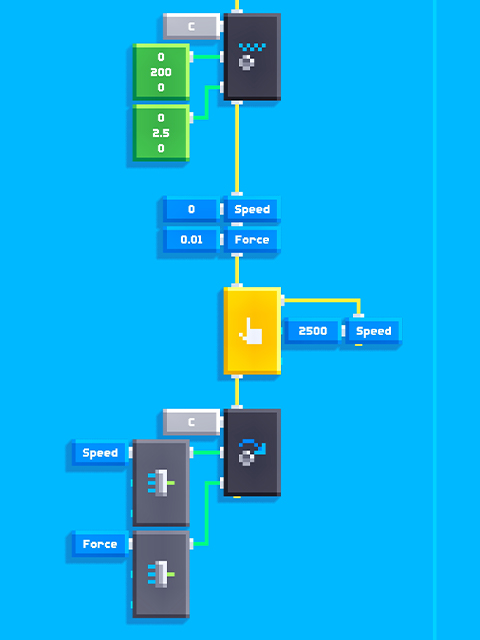
We can now speed up and slow down at will! However, we cannot turn yet.
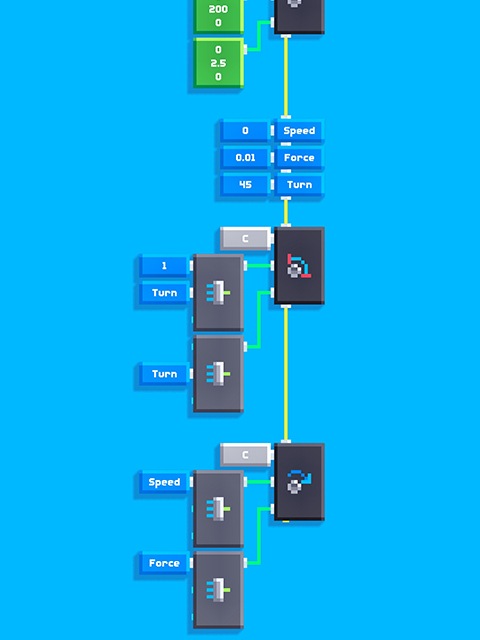
Going back to the script, we can use the Angular Limit block to set the turning angle of our wheels. As a test, I set the turning angle to a constant 45 degrees.
Hurray for turning wheels!
All the wheels are turning at once, but we only want the front wheels to turn. How do we fix this?
Looking at our list of wheels, we set both of the front wheels to be at index 0 and 1, and rear wheels at index 2 and 3.
So, a simple fix would be to check if the current wheel number is less than 2!
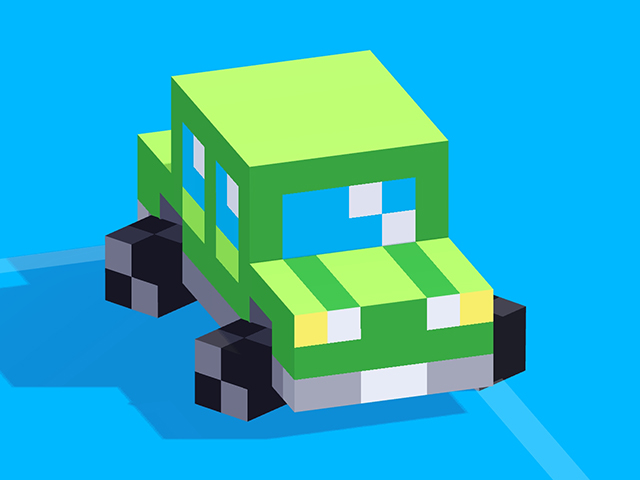
Yes! Not only are the front wheels turning, but the car is turning as well!
The car is so excited that it cannot stop turning. Fun, but also dangerous! So, in the following section, I will show you how to set up button controls for the car.
Adding controls to the car
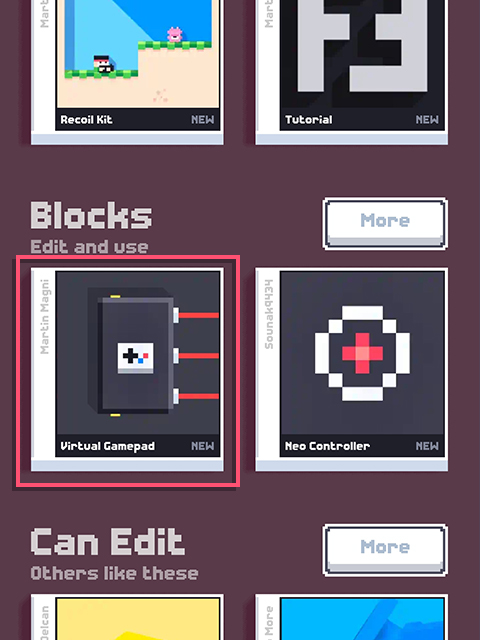
For our car controls, we will be using the Virtual Gamepad script by Martin Magni.
You can find it in the Blocks section on the Edit tab.
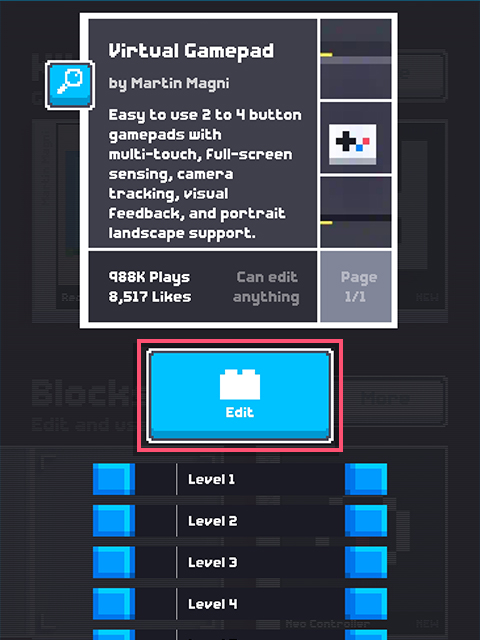
Tap the game cover, and tap edit. This will create a local copy of the game and put it in your projects.
Back in edit mode, open the inventory and scroll all the way down to the bottom. The virtual gamepad folder should appear at the very bottom.
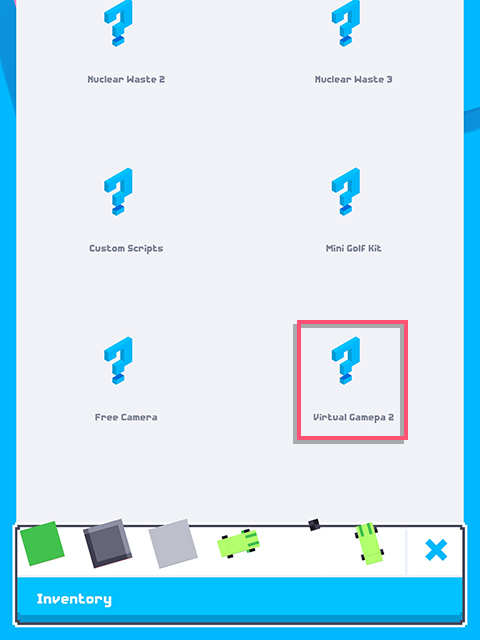
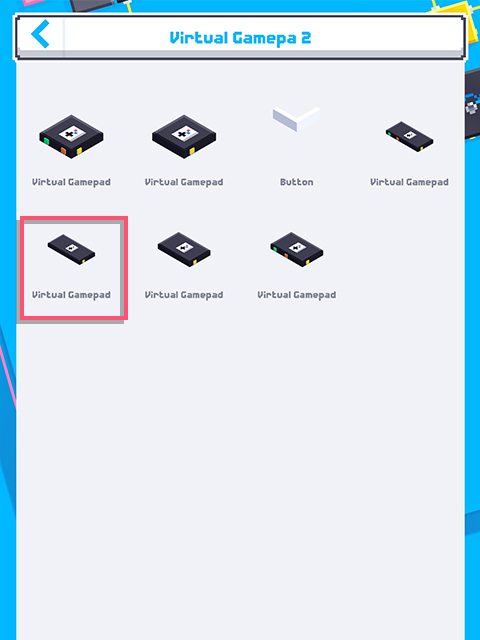
As you can see, there are several different gamepad scripts. We will be using the 4-button gamepad script for our car.

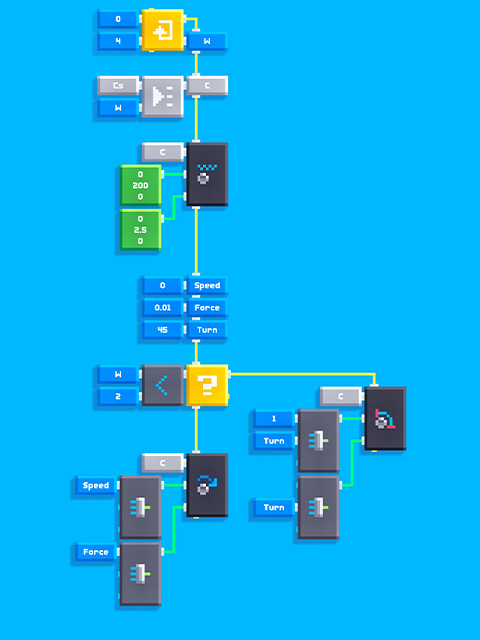
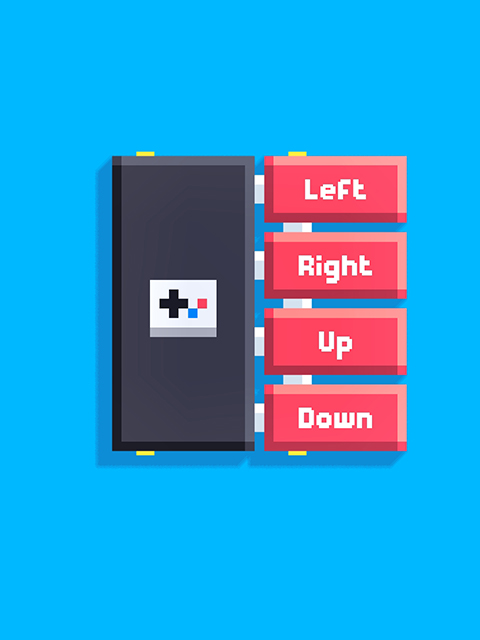
We will put the gamepad script near the top of our car script. Then, we will assign red variables to each of the 4 outputs. These outputs correspond to the 4 buttons that will appear on your screen when in play mode. The output will be true when the corresponding button is pressed.
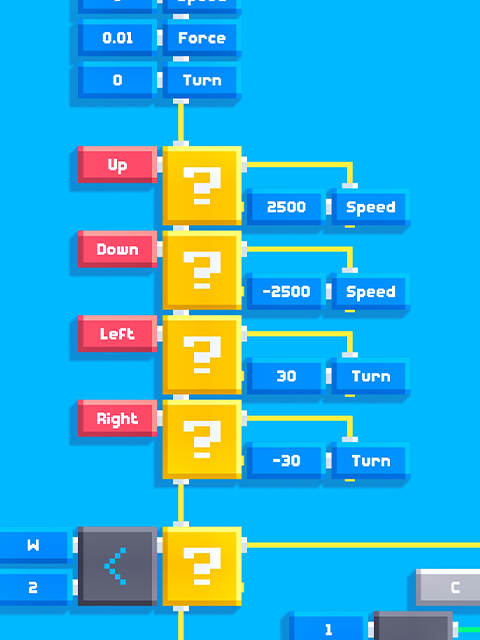
Now, you can use these 4 variables to configure the car controls!
If up is being pressed, we want to go forwards, and backwards when down is pressed. If left is pressed we want to turn left, and if right is pressed we want to turn right.
And you are done! You can now drive your car around the level with button controls!
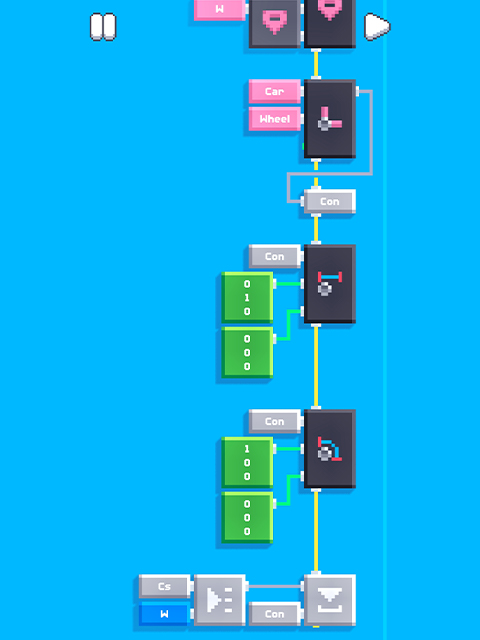
Here is an image of the whole script:
Have fun, and good luck with setting up your car! :)